How to Create Expiring Links

Expirable links allow you to automatically disable a link after a specific date and time. This feature is useful for limited-time offers, temporary campaigns, private access sharing, event registrations, and promotional content that should no longer be available after a deadline.
With Trakio, you can easily create links that expire automatically without needing to manually disable them later.
Common Use Cases for Expirable Links
Expirable links are commonly used for:
- Limited-time offers
- Promotional campaigns
- Temporary file sharing
- Event registration pages
- Time-sensitive content
- Early-access invitations
- Private or restricted resources
Step 1: Log in to Your Account
Open the login page and sign in to your dashboard:
If you do not already have an account, Sign Up Here
Step 2: Open the Links Section
After logging in:
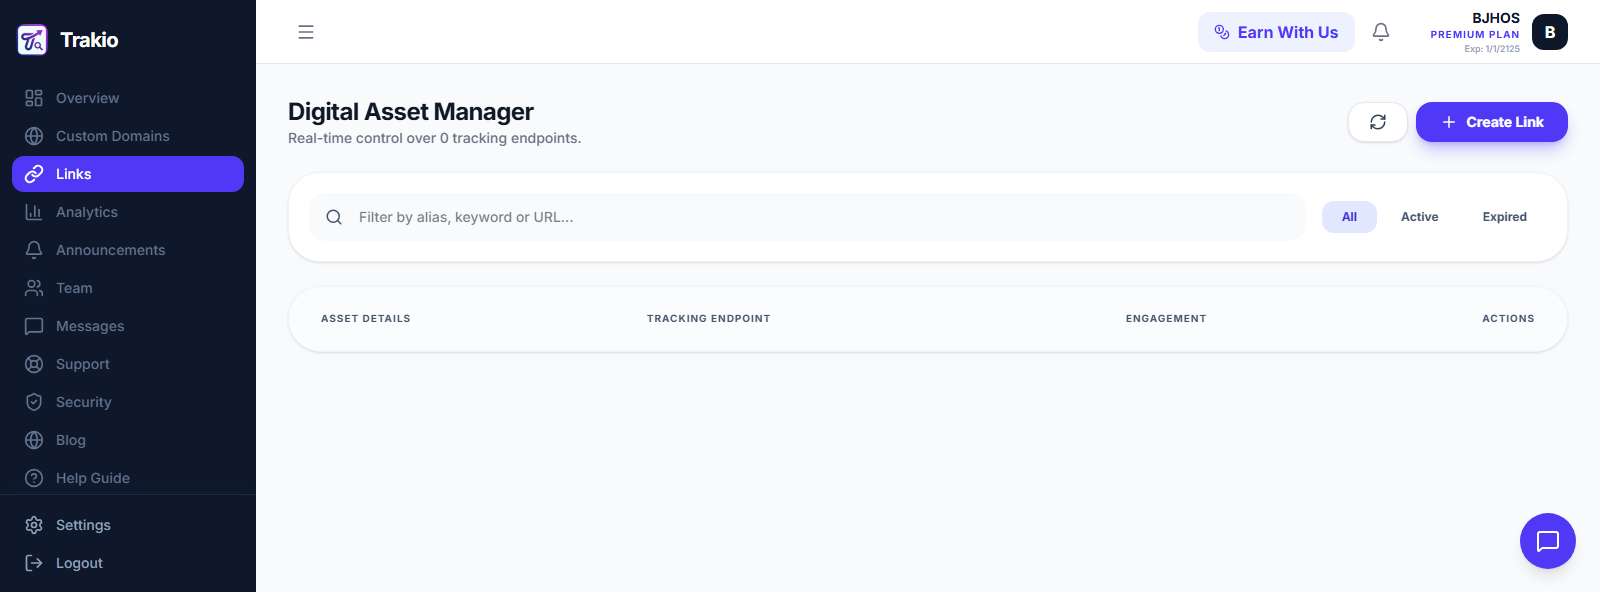
- Open the sidebar menu
- Click on “Links”
You will now see the Links management page.
Step 3: Create a New Link
Click the Create Link button.
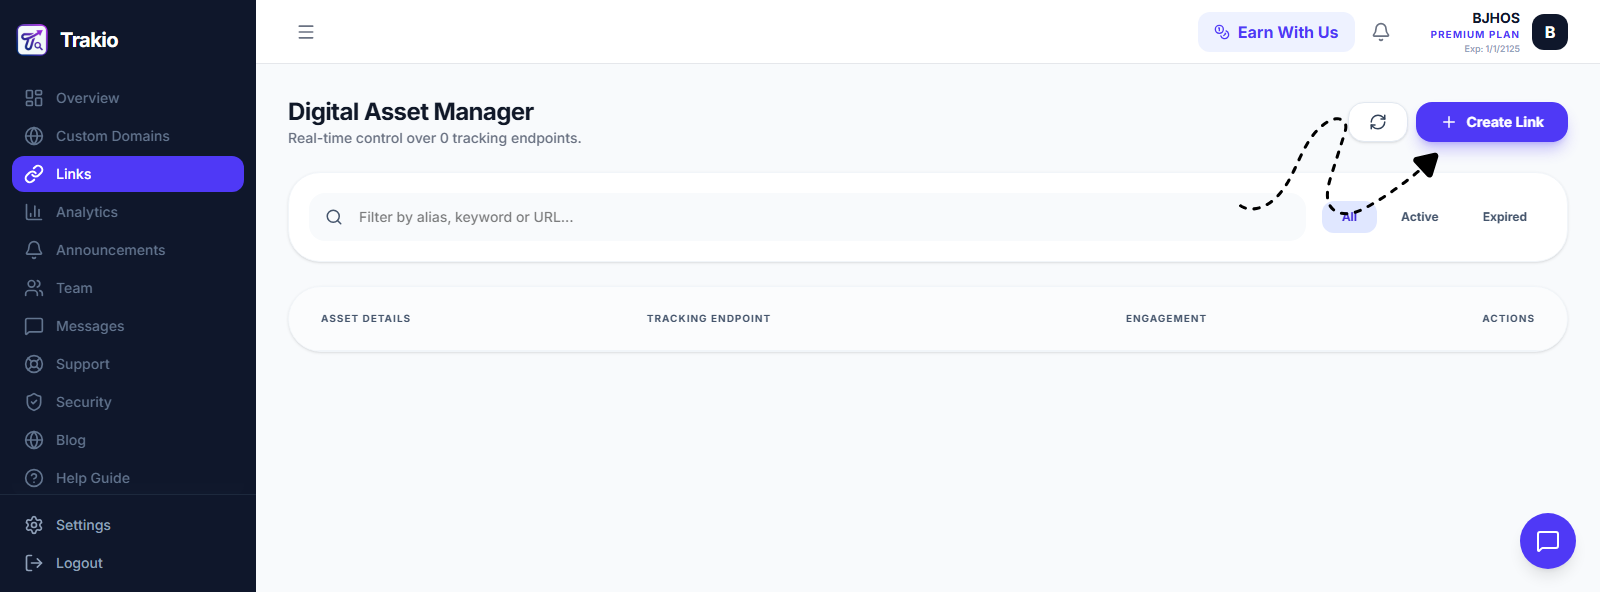
Now fill in the required details such as:
- Destination URL
- Short Link
After filling the required information, scroll down to the Expiration section.
Step 4: Enable Link Expiration
Go Down to Expiration toggle and enable it.
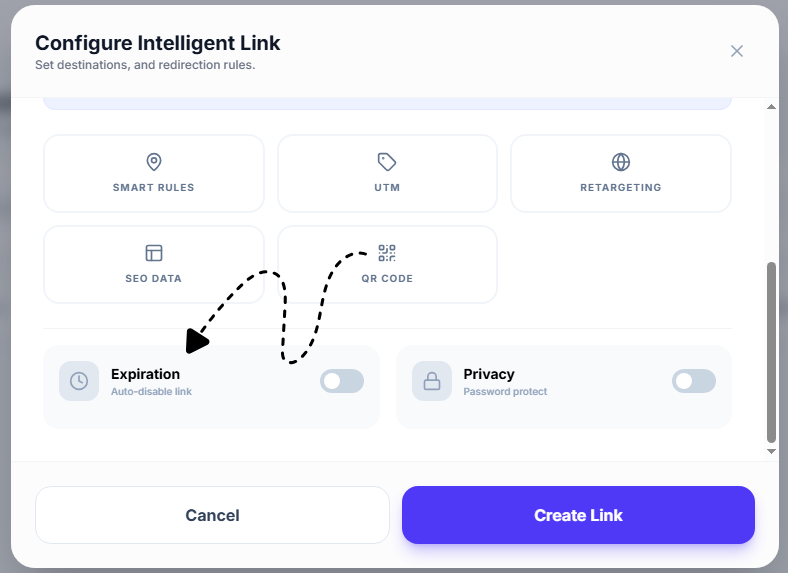
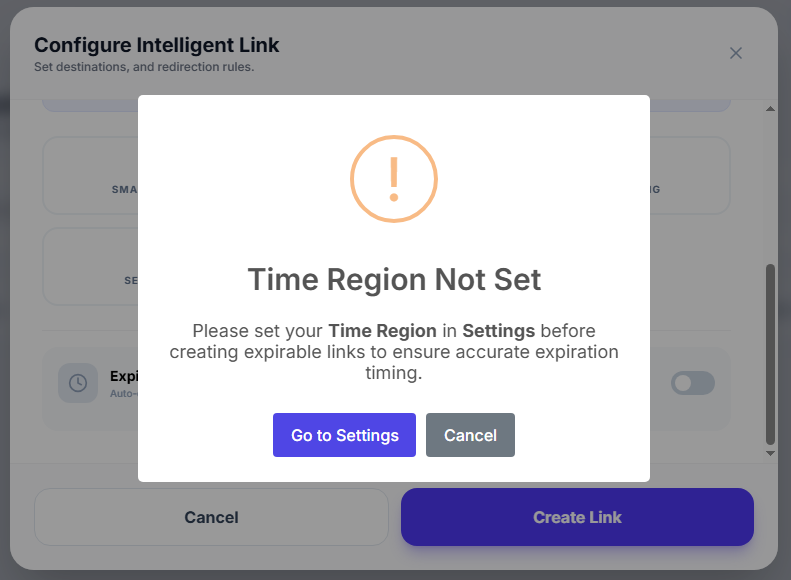
If this is your first time creating an expirable link, the system will ask you to configure your timezone before continuing.
Step 5: Configure Your Timezone
A popup will appear requesting you to set your timezone.
Click the Go to Settings button.
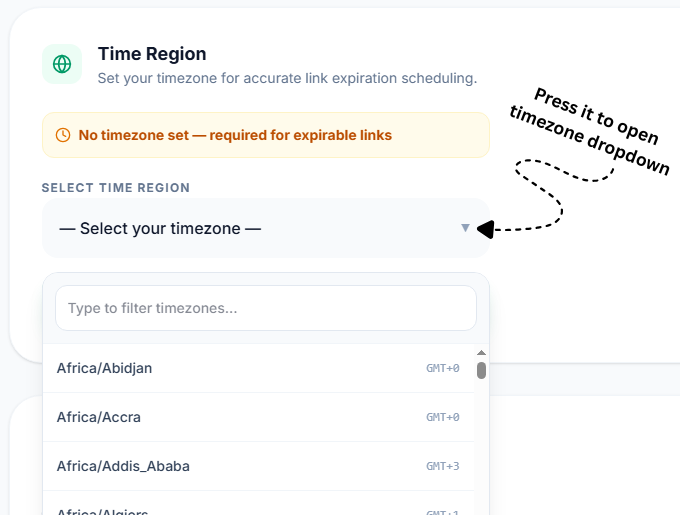
Inside Settings, locate the Timezone section.
Click the timezone dropdown and select your region.
Example:
- Asia/Karachi
You can also use the search bar to quickly find your timezone.
After selecting your timezone, save the settings.
Step 6: Create the Expirable Link
Return to the Links section and click Create Link again.
- Fill in the required link details
- Scroll down to the Expiration section
- Enable the Expiration toggle
This time, the timezone popup will not appear.
You will now see:
- Expiration Date
- Expiration Time
Select the exact date and time when the link should expire automatically.
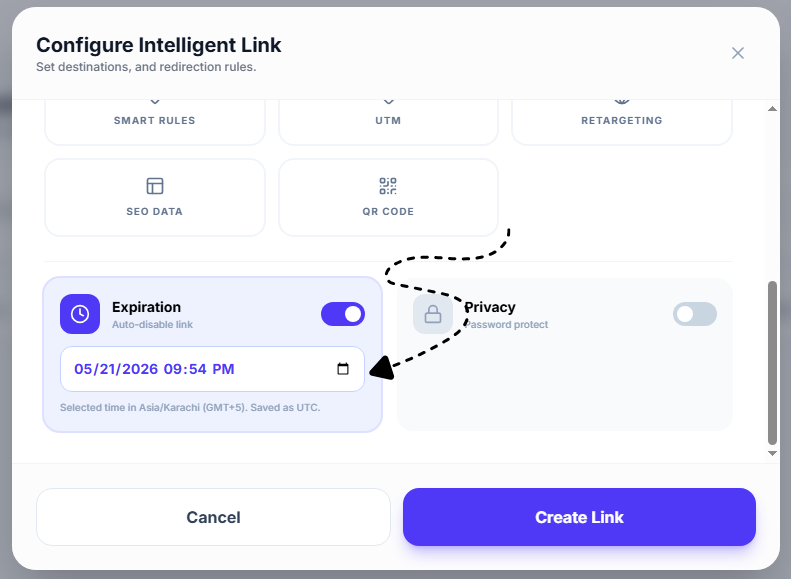
Once configured, click Create Link.
Your expirable link has now been successfully created.
How Expired Links Work
After the selected expiration time is reached:
- The short link becomes inactive automatically
- Users can no longer access the destination URL through that link
- No manual action is required
Reactivating an Expired Link
If a link has already expired and you want to activate it again:
- Open the Links section
- Click the Edit button for the associated link

Scroll down to the Expiration section.
You now have two options:
Option 1: Disable Expiration
Turn OFF the Expiration toggle completely.
This makes the link permanently active again.
Option 2: Set a New Expiration Time
Choose a new future date and time.
Make sure the selected time is later than the current time; otherwise, the link will remain expired.
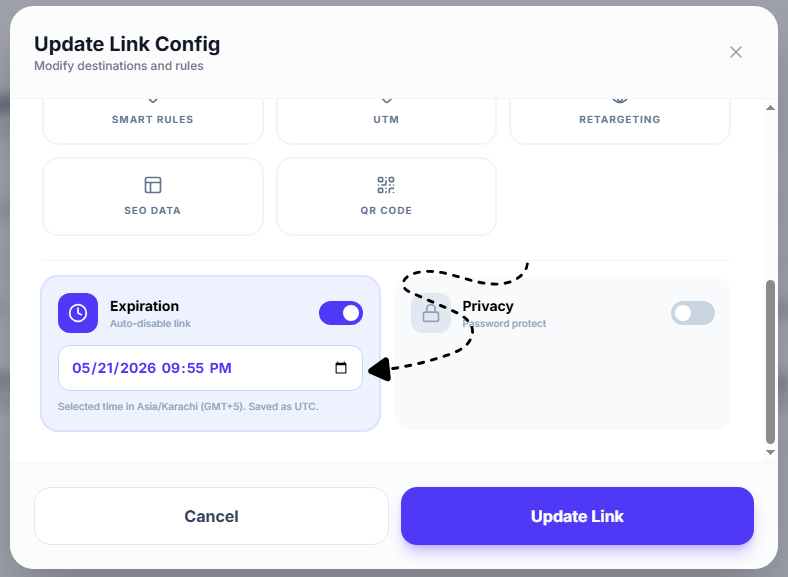
Save the changes after updating the settings.
Best Practices
Use Accurate Timezones
Always configure the correct timezone to avoid unexpected expiration timing.
Double-Check Dates
Verify the expiration date before creating the link to avoid accidental early expiration.
Monitor Campaign Links
Review expirable links regularly if they are part of active marketing campaigns.